
Kitchen & Bathroom Remodeling
Planning Plumbing Changes for Your Home Renovation: Showers, Toilets, and Layouts
A practical guide to mapping out pipe relocations, selecting modern shower valves, and choosing efficient low-flow toilets before remodeling begins.
September 1, 2026
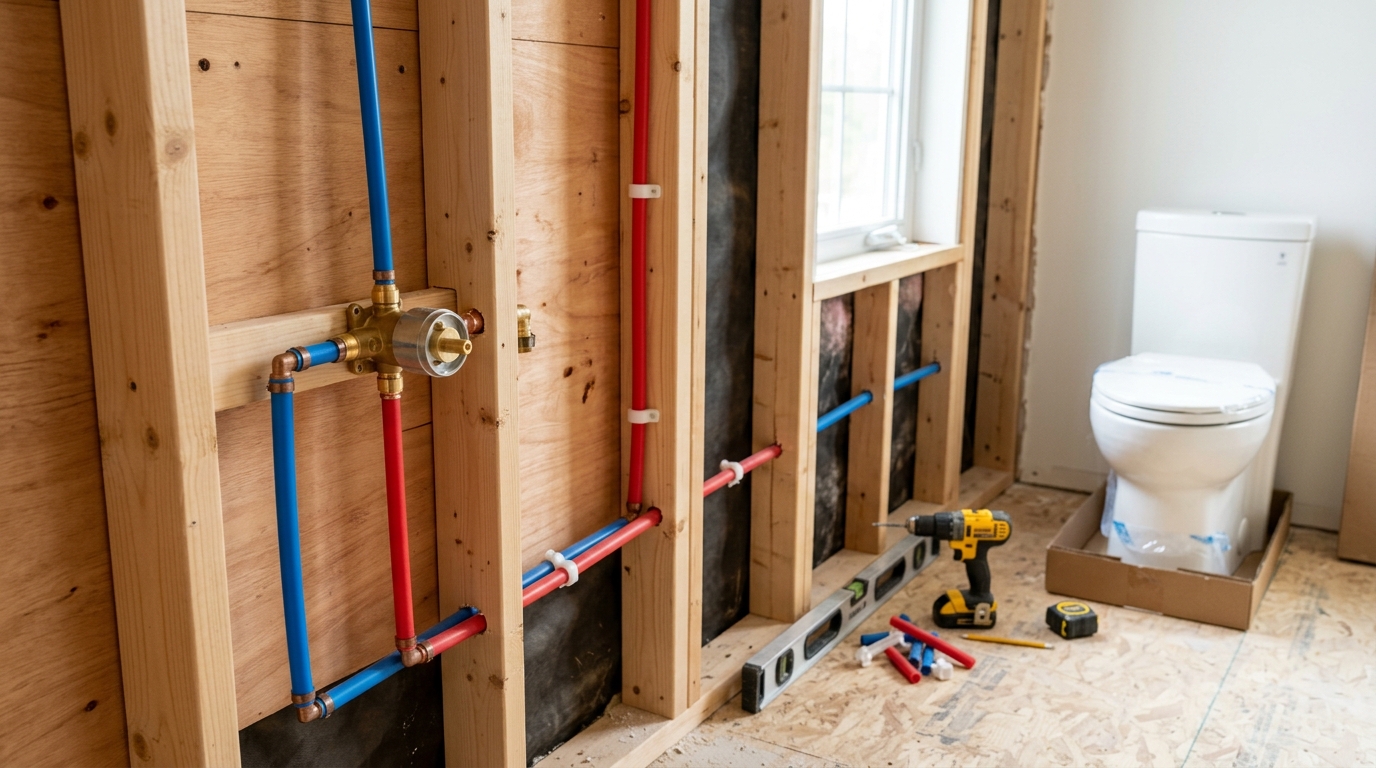
Embarking on a home renovation offers an ideal opportunity to modernize your plumbing system, improve daily convenience, and lower overall household water consumption. However, behind every high-end tile installation or sleek vanity lies a complex network of supply lines, vent pipes, and drainage systems that must work seamlessly together. Rushing into aesthetic choices without a clear plumbing plan can lead to costly rework, delayed project timelines, or fixtures that underperform due to inadequate water pressure or improper drainage slope.
Taking the time to evaluate your existing layout, select the correct valve types, and understand rough-in dimensions before demolition begins ensures your updated space functions as beautifully as it looks. Whether you plan to rearrange the entire footprint of a bathroom or simply replace outdated fixtures with modern, water-efficient models, careful advance planning is the key to a smooth renovation.
1. Assessing the Layout: Moving Fixtures vs. Keeping Existing Lines
One of the first major decisions during a bathroom or kitchen renovation is whether to preserve the existing fixture layout or relocate items like sinks, toilets, and showers. Keeping fixtures in their original positions is generally the most straightforward path, as it relies on established supply lines, drain pipes, and vent stacks.
When you decide to relocate fixtures, several structural and mechanical factors come into play:
- Drain Slope and Floor Joists: Waste pipes require a continuous downward slope (typically 1/4 inch per foot for standard residential lines) to carry wastewater away effectively. Moving a toilet or shower across a room may require cutting or drilling through floor joists, which must be done within strict structural framing limits to avoid weakening the home.
- Drain-Waste-Vent (DWV) Integration: Every fixture requires proper venting to allow sewer gases to escape and to prevent water traps from siphoning dry. Extending or adding new vent lines often requires routing pipe up through interior walls to connect with the main stack or directly through the roof.
- Supply Line Sizing: Branch lines must deliver adequate volume and pressure to the new fixture locations without creating unnecessary pressure drops when multiple fixtures run simultaneously.
2. Upgrading Shower Fixtures: Valves, Flow Rates, and Lines
Upgrading a shower is often a centerpiece of a bathroom remodel. Modern shower systems range from simple single-head replacements to complex multi-outlet installations with hand showers, body sprays, and rain showerheads. Planning the plumbing behind the wall is essential to making sure your new setup performs reliably.
Selecting the Right Shower Valve
The valve concealed behind the wall controls water flow and temperature regulation. The two primary types used in residential remodels are:
- Pressure-Balanced Valves: These valves maintain a balanced ratio of hot and cold water pressure. If a toilet flushes elsewhere in the house and drops cold water pressure, the valve adjusts the hot water output to prevent sudden temperature spikes.
- Thermostatic Valves: These offer independent control of water temperature and water volume. Thermostatic cartridges monitor actual water temperature, maintaining a precise setting regardless of pressure fluctuations, making them ideal for multi-outlet configurations.
Supply Pipe Capacity and Drainage
Standard shower installations typically utilize 1/2-inch copper or PEX supply lines. However, if your renovation includes multiple simultaneous showerheads or high-flow body sprays, 1/2-inch lines may not supply enough volume, resulting in weak water pressure. In these cases, upgrading the supply run to 3/4-inch lines back to the main distribution manifold is often recommended.
Drainage must also match the output of your shower fixtures. Standard shower bases often use 2-inch drain pipes, whereas older tub-and-shower combinations may have used 1-1/2-inch drains. Converting an old tub into a walk-in shower requires expanding the drain line to 2 inches to handle shower runoff without pooling.
3. Installing Modern Low-Flow and Dual-Flush Toilets
Older toilets manufactured before the mid-1990s can consume between 3.5 and 7 gallons per flush. Upgrading to modern low-flow or dual-flush toilets significantly reduces water usage while improving clearing performance through engineered bowl designs and glazed trapways.
Understanding Rough-In Dimensions
Before purchasing a new toilet, accurate measurement of the "rough-in" distance is critical. The rough-in is the distance from the finished wall behind the toilet to the center of the floor drain (the closet flange bolts). While 12 inches is the standard residential rough-in measurement, older homes or tight powder rooms may feature 10-inch or 14-inch rough-in dimensions. Purchasing a toilet designed for your specific rough-in ensures proper clearance from the wall and seamless flange connection.
Gravity vs. Pressure-Assisted Flushing
Modern water-efficient toilets use various mechanisms to clear the bowl effectively using 1.28 gallons per flush (or less):
- High-Efficiency Gravity Toilets: These utilize optimized bowl geometry, larger flush valves (typically 3 inches or wider), and fully glazed trapways to create a strong siphon with minimal water volume.
- Dual-Flush Toilets: These provide two distinct flush options: a lower-volume flush for liquid waste (around 0.8 to 1.0 gallon) and a standard flush for solid waste (1.28 to 1.6 gallons).
- Pressure-Assisted Toilets: These feature a sealed pressure tank inside the porcelain tank. Incoming water compresses air within the tank, creating a forceful, jet-like flush that clears waste quickly. They are highly effective, though slightly louder during the flush cycle.
4. Project Phasing and Rough-In Coordination
Plumbing changes should follow a clear sequence during any remodeling project. Demolition must be completed down to the studs or subfloor before new rough-in piping is run. This allows full visibility of existing electrical, framing, and HVAC systems, preventing accidental damage and allowing proper alignment.
Once the rough-in plumbing is installed, lines should be pressure-tested to ensure all joints are secure before walls are closed with cement board, drywall, or tile. Final fixture installation—such as mounting shower trim plates, installing sink faucets, and setting toilets onto their wax or rubber seals—takes place after painting and tiling are finished, protecting new fixtures from construction dust and impact damage.